Saturday, 30 May 2009
Converting to B&W in PS
There are many, many ways of converting from a colour image to B&W, in Camera Raw, Photoshop and by 3rd party plug-ins. You can also choose “In-Camera” monochrome for a much smaller file but please don’t!
These include
1. Image►Mode►Greyscale (Surprisingly good but convert back to RGB)
2. Image►Adjust►Desaturate Shift+Ctrl+U (Eliminates colour without altering brightness values which can make different colours very similar.)
3. Image►Adjust►Hue&Saturation►Desaturate 100% (As above)
4. Image►Mode►Lab Delete all channels except the Lightness Channel, then Image►Mode►Greyscale, then Image►Mode►RGB (Gives lighter tones and separates colours better than just Greyscale)
5. I have my favourite quick method set up as an Action –
Image►Mode►Lab ►Desaturate► Image►Mode►RGB (I find this satisfactory for 90% of my images.)
6. Image►Adjust►Channel Mixer & tick the Monochrome and Preview boxes.
This is the favourite of many advanced workers as it gives a high degree of control using the colour sliders. It takes time to master but can be worth the effort. To maintain the same brightness levels you should aim for a combined value around 100% but please experiment. (You don’t usually touch the Constant slider). Try some of these combinations.
Red 100% Green 0% Blue 0% (Default Red filter effect)
Red 50% Green 50% Blue 0% (Good landscape effect)
Red 0% Green 100% Blue 0% (Green filter effect)
Note: Channel Mixer has been overtaken by the CS3 Mono Converter - a much better tool.
7. CS3 Monochrome Converter
Image►Adjust►Black&White Alt+Shift+Ctrl+B
When the menu opens the default settings are applied. You can try Presets or Auto and you can save your own custom presets. Whatever you do it is just a starting point.
Experiment with the colour sliders (make sure the Preview box is ticked) or you can adjust with the cursor hovering on the image. Choose the area you are interested in, Left Click and Drag. Only the colours that make up that area are adjusted but they are affected over the whole image.
You can also apply a colour tint. Tick the Tint box and experiment with the sliders.
8. Calculations
Image►Calculations Alt+ Ctrl+C
I don’t much like Calculations but nearly everyone is frightened of the dialogue box so it’s worth learning just to impress the less adventurous!
All it does is blend two grayscale channels in various combinations and styles. Your task is to choose the two channels that blend best and to make it look darker (Multiply) or lighter (Screen). (By default it blends two copies of the Red Grayscale Channel in Multiply mode but you are free to choose many other channels and blend modes in multiple combinations).
9. Black & White Conversion from Camera Raw
I don’t use this much but it works.. When you open your image in Camera Raw – you can now open Jpeg and Tiff in the same menu – click on the HSL/Grayscale tab and tick the Convert to Monochrome box. Click on the Basic tab and adjust Exposure, Black Point, etc. Then click on Tone Curve tab and tweak your image there. Quick and easy and your image won’t need too much adjustment when you open it in Photoshop.
10. Magic with Hue & Saturation Layers
Open two Hue & Saturation Layers at the top of the stack, set the top one to Blend Mode Colour and move the Saturation Slider to Zero. Click on the lower Hue & Saturation layer and experiment with Hue Slider and the Saturation Slider – both in Master and in Red, Green & Blue.
You can also experiment with Lightness. For example, to darken a “blue” sky choose Blue from the drop down menu and move the Lightness Slider to Zero.
10. Printing B&W
This is a whole subject in itself but use a suitable good paper such as Permajet Portrait, Portfolio, Matt Plus or the spectacularly good Fibre Based Gloss (Neutral, Warmtone or Royal) which is the nearest thing to a traditional darkroom print I’ve seen. Use Oyster for a “Resin Coated” finish. Permajet also supply the best Ink Flow system on the market and will provide you with Free Custom made Profiles for your specific printer and your favourite papers.
If you don’t have an Epson 2400 or later and you need to avoid colour casts print RGB with a slight (brown) tone or Black Ink only at 1440 DPI. Better still buy a new printer!
If you do have a 2400 or better there is whole other world of Monochrome possibilities in the printer menu.
This is an extract from my “Photoshop for Advanced Beginners” workshop course notes.
Rod Wheelans FRPS MFIAP MPAGB FIPF AMPA APAGB
www.creative-camera.co.uk rod@creative-camera.co.uk 01387 257906
30 May 2009
Friday, 29 May 2009
ANNUAL EXHIBITION
11th-23rdJULY
AS USUAL, THIS WILL BE HELD IN THE Galilee Chapel of Durham Cathedral
We have space for one hundred and ten pictures, ALL MOUNTED ON 20”X16” MOUNTS.
All members can enter three current images.
In the event of being over subscribed we may have to reduce this to two, so please mark them on the back 1,2,3 so that the No. 3s may be removed without further discussion with the author.
There is every chance that we will only use two prints per person, as the entry for the Botanic gardens exhibition was 55 from 55 members and we hope for similar enthusiasm for the Cathedral exhibition.
Anyone who requires assistance with mounting, please contact one of the committee.
ALL PRINTS TO BE IN BY 25th JUNE
PLEASE ADD YOUR NAME AND THE NUMBER OF PRINTS YOU WILL OFFER TO THE ACCOMPANING LIST
JUNE ASSIGNMENT
DURHAM REGATTA
This is held on
Saturday 13th and Sunday 14th, June
To get the best out of the weekend, check the weather forecasts and select the day that suites you. Because this is a two day event we can’t meet at a place and time as last time but the aim is the same
TO PRODUCE THREE PRINTS THAT YOU FEEL HAPPIEST WITH.
These will be seen and discussed at
a venue to be decided, probably on Wednesday, 24th June
Don’t forget to think of a site for the next Assignment!
Thursday, 28 May 2009
e-news from the Photographic Alliance of Great Britain
Sunday, 24 May 2009
The Harry Holder Memorial Lecture
“Monochrome Prints and Printing”
Presented by Anne Greiner MPAGB and Rod Wheelans MFIAP, FRPS, MPAGB, FIPF, members of Dumfries CC
Link to Dumfries cc
Link to Anne & Rod's Web-Site.
Wednesday, 20 May 2009
Our President's Report for May 2009
This month we had two speakers with a similar recipe for success. Both Simon Allen and Jim Welsh had devised ways of making fairly ordinary seeming pictures into images that stood out from the crowd. Jim had a bought-in solution and Simon had devised his own Photoshop techniques to distort reality and so grab attention. They both seemed to work and if entering big competitions is your aim then perhaps that could be the way forward.
I was impressed by the enthusiasm of our guests from Hartlepool and I am sure that some mutual benefit was obtained from the exchange. I also enjoyed the comments of Alan Porrett and found him an excellent competition judge. His picture analysis was precise and to the point.
Can I say that it was a great pleasure to see one of our newer members, John Siddle, present his Associate level panel of work to a meeting of the Royal Photographic Society at Whickham a couple of weeks ago. Well done John Siddle ARPS.
Alan Stott
Friday, 15 May 2009
DI Progress Comp.Rnd 2.- -Judged by George Ledger
Saturday, 9 May 2009
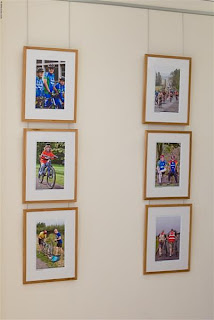
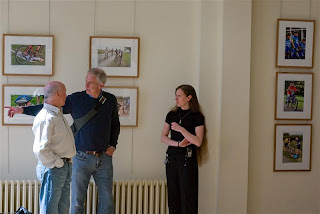
Durham Big Ride Exhibition
The Northern Echo
Link to 2008 Pictures
All Pictures John Attle


Sunday, 3 May 2009
Photography Assignment
Members enjoyed a Photography Assignment day out at this popular destination on Saturday 18th April 2009. Set a challenge by DPS General Secretary, Colin Armitstead, to capture images through the eyes and interpretations of individual photographers, we met to show prints and discuss the work and the experience on Wednesday, 30th April. Each member in turn selected their favourite print, talked about the thinking behind it, followed by feedback and questions from the others. All in all, it was a stimulating and enjoyable experience and everyone agreed this was yet another opportunity to progress their photography through membership of the Society.
The next Photography Assignment will be around the Durham Regatta, 13th and 14th June – details to follow. It will be open to all members who are willing to produce at least three prints for the feedback day.
 Angy Ellis


 2nd Place.Silver Link---Don Bennett


